
티스토리 뷰
안녕하세요. 지난 번에 Slack, Email의 java연동 방법에 대해서 포스팅을 진행하였는데, 오늘은 또 다른 메신저인 Telegram의 bot 연동을 통해서 Notification을 받아볼 수 있는 방법에 대해서 bot 생성 부터 연동 및 테스트 까지의 과정을 포스팅 해보려고 합니다. 오늘 연동하려는 Telegram의 로고는 아래와 같습니다.

Telegram Bot 구성
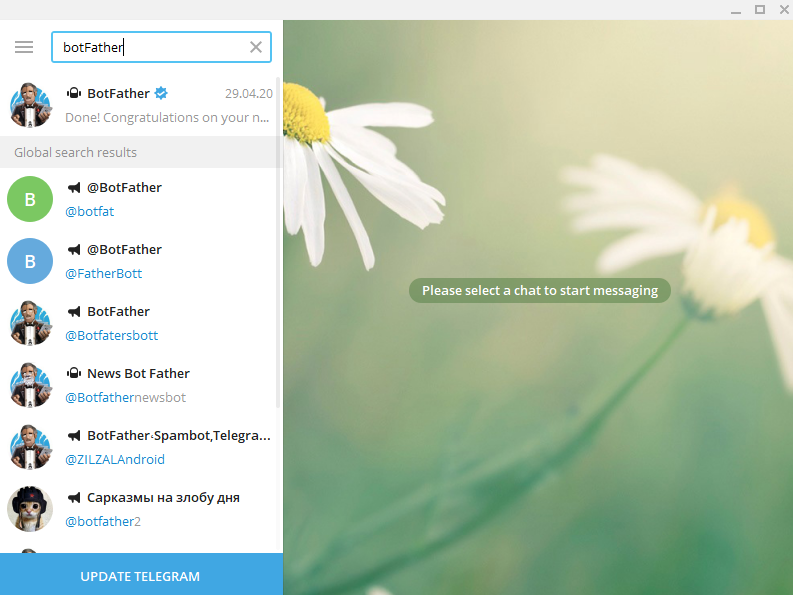
1. 텔레그램 앱을 접속 한 후, BotFather를 검색합니다.
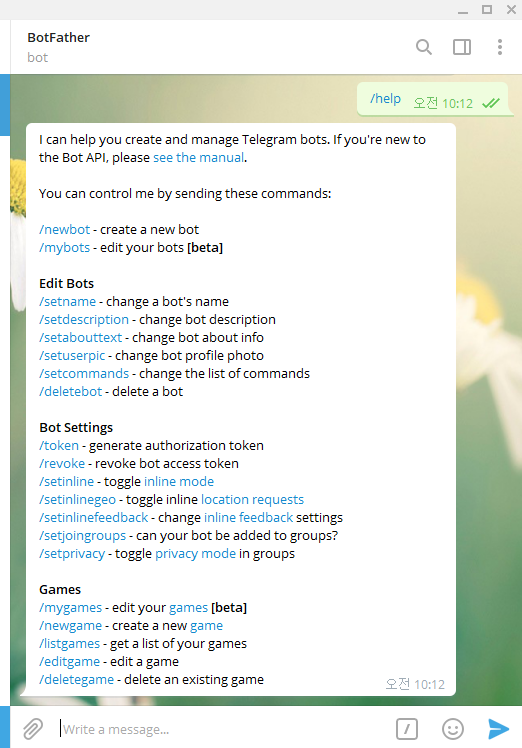
2. botFather를 통해서 실행할 수 있는 명령어는 다음과 같습니다.
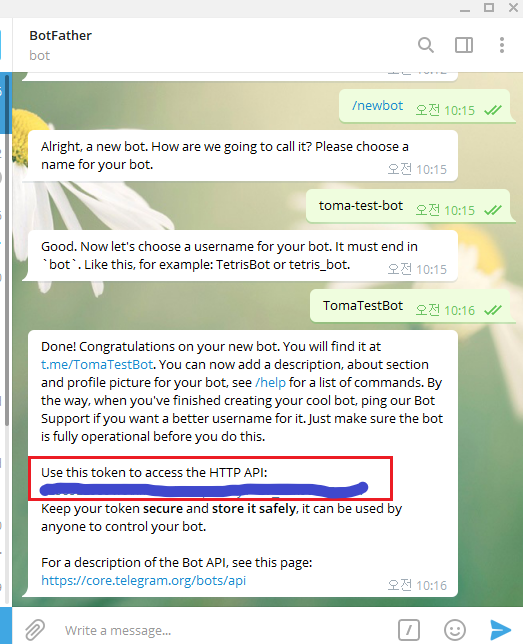
3. /newbot을 입력해서 새로운 bot을 생성합니다.
4. Telegram chat_id 조회
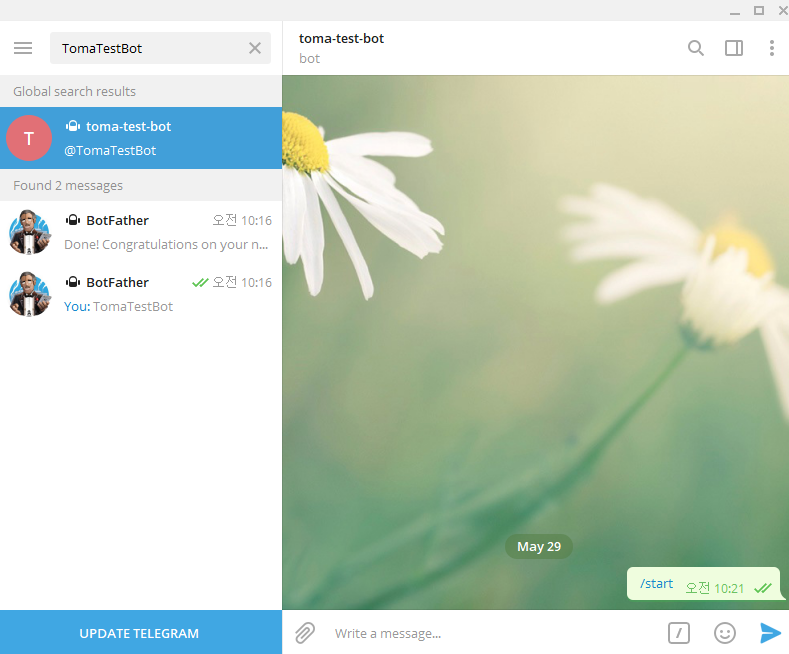
방금 만들었던 bot을 찾아, start 버튼을 누르면 아래와 같이 진행이 됩니다.
5. 브라우져에서 https://api.telegram.org/bot{BOT_TOKEN}/getUpdates 를 호출합니다.
여기서 bot_token은 위에서 봇 생성과 함께 발급받은 token을 넣어 주시면 됩니다.

여기서 얻은 chat_id를 token과 함께 기록 또는 기억 해놓습니다. 이로써, Telegram bot 구성은 끝났으며, java와 연동을 진행해보도록 하겠습니다.
application.properties설정
# External Interface (Telegram)
notification.telegram.enabled=false
notification.telegram.bot.token=110056510002959:XXXhxaXXbrXXXEU8XXXXXXXXXX
notification.telegram.chat.id=000000000
위에서 기록또는 기록으로 얻었던 bot token 및 chat_id를 작성해줍니다.
Java Telegram 연동
우선 앞서 진행했던 NotificationManger에 Telegram도 추가해줍니다.
package com.example.demo.notification;

import com.example.demo.notification.sender.EmailSender;
import com.example.demo.notification.sender.SlackSender;
import com.example.demo.notification.sender.TelegramSender;
import org.slf4j.Logger;
import org.slf4j.LoggerFactory;
import org.springframework.stereotype.Component;

@Component
public class NotificationManager {

  private Logger logger = LoggerFactory.getLogger(NotificationManager.class);

  private final SlackSender slackSender;
  private final EmailSender emailSender;
  private final TelegramSender telegramSender;

  public NotificationManager(SlackSender slackSender,
      EmailSender emailSender, TelegramSender telegramSender) {
    this.slackSender = slackSender;
    this.emailSender = emailSender;
    this.telegramSender = telegramSender;
  }

  public void sendNotification() {
    logger.info("#### send Notification.");

    // generated Message
    String contents = generatedMessage();

    // send slack
    //slackSender.sendSlack(contents);

    // send mail
    //emailSender.sendMail(contents);  // use commons-email

    // send telegram
    telegramSender.sendTelegram(contents);
  }

  /**
   * generated Message.
   *
   * @return
   */
  private String generatedMessage() {
    StringBuilder sb = new StringBuilder();

    sb.append("[Notification]").append(System.getProperty("line.separator"))
      .append("[Name] : ").append("Tester").append(System.getProperty("line.separator"))
      .append("[Message] : ").append("테스트 메시지 !!");

    return sb.toString();
  }
}
텔레그램 메세지 전송을 위한 포맷을 맞춰주기 위해 다음과 같이 TelegramMessage를 작성했습니다.
package com.example.demo.notification.message;

import com.google.gson.annotations.SerializedName;

public class TelegramMessage {

  @SerializedName("chat_id")
  private String chatId;
  private String text;

  public TelegramMessage() {
  }

  public TelegramMessage(String chatId, String text) {
    this.chatId = chatId;
    this.text = text;
  }

  public String getChatId() {
    return chatId;
  }

  public void setChatId(String chatId) {
    this.chatId = chatId;
  }

  public String getText() {
    return text;
  }

  public void setText(String text) {
    this.text = text;
  }
}
그리고, telegram 메세지를 전송할 TelegramSender를 다음과 같이 작성해줍니다.
package com.example.demo.notification.sender;

import com.example.demo.notification.message.TelegramMessage;
import com.google.gson.Gson;
import org.slf4j.Logger;
import org.slf4j.LoggerFactory;
import org.springframework.beans.factory.annotation.Value;
import org.springframework.http.HttpEntity;
import org.springframework.http.HttpHeaders;
import org.springframework.http.MediaType;
import org.springframework.stereotype.Service;
import org.springframework.web.client.RestTemplate;

@Service
public class TelegramSender {

  private Logger logger = LoggerFactory.getLogger(TelegramSender.class);

  @Value("${notification.telegram.enabled}")
  private boolean telegramEnabled;

  @Value("${notification.telegram.bot.token}")
  private String token;

  @Value("${notification.telegram.chat.id}")
  private String chatId;

  public void sendTelegram(String contents) {

    if (telegramEnabled) {
      // make a request URL using telegram bot api
      String url = "https://api.telegram.org/bot" + token + "/sendMessage";

      try {
        TelegramMessage telegramMessage = new TelegramMessage(chatId, contents);
        String param = new Gson().toJson(telegramMessage);

        RestTemplate restTemplate = new RestTemplate();
        HttpHeaders headers = new HttpHeaders();
        headers.set("Content-Type", MediaType.APPLICATION_JSON_VALUE);

        // send the post request
        HttpEntity<String> entity = new HttpEntity<>(param, headers);
        restTemplate.postForEntity(url, entity, String.class);

      } catch (Exception e) {
        logger.error("Unhandled exception occurred while send Telegram.", e);
      }
    }
  }
}
테스트
위에서 작성한 코드들이 잘 동작하는지 테스트 코드를 아래와 같이 작성해서 테스트를 실행합니다.
package com.example.demo.notification;
import org.junit.Test;
import org.junit.runner.RunWith;
import org.springframework.beans.factory.annotation.Autowired;
import org.springframework.boot.test.context.SpringBootTest;
import org.springframework.test.context.junit4.SpringRunner;
@RunWith(SpringRunner.class)
@SpringBootTest
public class NotificationManagerTest {
@Autowired
private NotificationManager notificationManager;
@Test
public void NotificationTest() {
notificationManager.sendNotification();
}
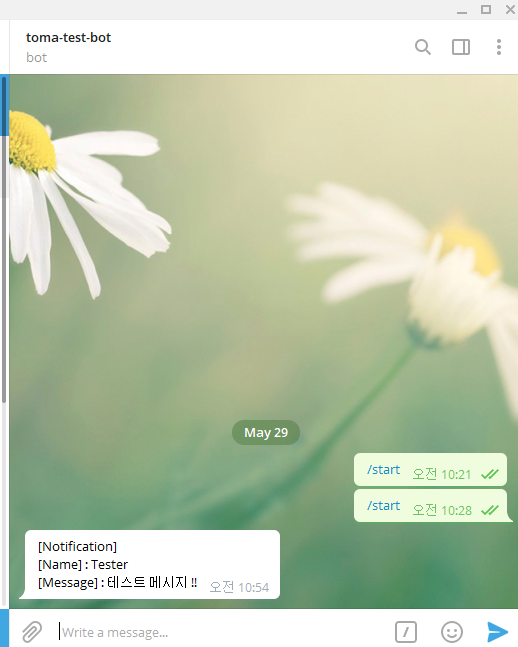
}테스트가 정상적으로 실행되는 것을 확인 할 수 있으며 결과는 아래와 같이 텔레그램 bot을 통해서 메세지를 받아볼 수 있습니다.
이것으로 java Telegram bot 연동에 대한 포스팅을 마치도록 하겠습니다.
- Total
- Today
- Yesterday